Nearly all recipes feature flour heat-treating methods that the Food and Drug Administration and food safety experts explicitly warn against
Author of the article:

Published Jul 25, 2026 • Last updated 2 hours ago • 8 minute read
Article content
We independently select everything we recommend. Buying through us may earn us a commission, which supports our work.
See more Toronto Sun on Google — save as a Preferred Source
Advertisement 2

Article content
If you’ve ever baked cookies, you’ve probably snuck a taste of the raw dough and loved it – all while knowing that it may not be the safest thing to do. I’m sorry to be that buzzkill, but, yes, consuming raw dough introduces the possibility of foodborne illness.
Article content
Recommended Videos
Article content
Eggs carry a salmonella risk, but there’s also the lesser-known risk of raw flour, which can be contaminated with both salmonella and E. coli. So if you want to eat the dough without baking it, you need to find a safe edible cookie dough recipe, but that’s easier said than done.
Nearly all recipes feature flour heat-treating methods that the Food and Drug Administration and food safety experts explicitly warn against. Recipes suggest putting dry flour in the oven, zapping it in the microwave or dry-roasting it in a pan. But these methods are ineffective, since a very high temperature is required to kill Salmonella cells in dry environments.
“Salmonella is a particularly tough pathogen to deal with because it becomes more heat resistant in dry environments, like flour,” says Lu Zhang, a food scientist at the University of Hong Kong. “Also, due to flour’s low moisture content, it is a poor conductor of heat, making it difficult to heat evenly. Both microwaves and conventional ovens struggle to distribute heat uniformly across all flour particles, which further complicates the elimination of the pathogen.”
Advertisement 3
Article content
My solution? Start with a roux heated to 300 degrees. Fully combining flour with hot fat means that every particle is surrounded by heat. Heating the mixture into a roux that reaches that temperature, then cooling it, would “drastically reduce any of the bacterial risks traditionally associated with these foods,” says Benjamin Chapman, a professor and food safety extension specialist at North Carolina State University. Chapman co-hosts the podcasts “Food Safety Talk” and “Risky or Not” with Donald Schaffner, a professor and food science extension specialist at Rutgers University. Schaffner, who is also well-versed in the research around salmonella in low-moisture environments, agreed that this method “should be quite safe.”
A roux has two of the main ingredients in a standard cookie dough: flour and butter. Here, the combination is heated to address the safety concerns of raw flour. Add a little milk, and you essentially make a very thick béchamel sauce. Then add sugar and other cookie ingredients (vanilla, chocolate chips, salt), and you have a safer edible dough. It might sound a little unusual, but this technique actually has roots in global traditions.

Your Midday Sun
Article content
Advertisement 4
Article content
I’m Assyrian, and my family is from Syria and Iraq, a region with a centuries-long tradition of making flour halvah, a sweet that’s completely different from tahini halvah. Flour halvah is essentially made with a roux that’s sweetened with date syrup, which then sets up into a gloriously doughy dessert. Assyrian and Iraqi flour halvah inspired this recipe’s technique, but I’ve taken it in a chocolate chip cookie dough direction. Instead of date syrup, I’ve used granulated and brown sugars, which create the sugary grittiness and toffee flavour characteristic of raw cookie dough.
The texture of the dough starts out looking very similar to flour halvah at warm room temperature, but after it sets up in the refrigerator or freezer, it’s hard to distinguish it from conventional cookie dough. The main difference is additional caramelization, similar to a dough made with brown butter, since the flour and milk solids get nicely toasted during the roux process. But with all that brown sugar, vanilla and chocolate chips, its flavour is squarely in chocolate chip cookie dough territory.
Advertisement 5
Article content
If you want to get more creative than enjoying it by the spoonful, there are two things you should keep in mind: First, it is malleable before you chill it completely, so if you want to shape the dough, do so soon after stirring in the chocolate chips. Second, like a regular cookie dough, it will not freeze completely solid, so it works well in frozen treats. A few ideas:
Since the structure of a cookie dough is much less technical than something you might actually bake, there’s a lot of room for improvisation here. Here are some variations:
Making edible cookie dough work for different dietary needs is even more straightforward than a regular cookie since you don’t have to worry about how it will bake up.
If you’re vegan or dairy-free, you can use a nondairy butter in place of the regular butter; soy milk or almond milk in place of the cow’s milk; and vegan chocolate chips.
If you strictly avoid alcohol, you can use 1 teaspoon vanilla powder or nonalcoholic vanilla flavouring instead of the vanilla extract (but the very small amount of alcohol should be fine for many people).
Advertisement 6
Article content
If you’re gluten-free, you can make this recipe with a cup-for-cup replacement blend. We used Bob’s Red Mill Gluten Free 1-to-1 Baking Flour in our testing. It will look much thinner during the roux stage, but don’t worry – it will thicken once you add the milk. With a gluten-free flour blend, the mixture will start browning earlier, so you will need to pour in the milk at around 260 to 270 degrees to make sure it doesn’t scorch. This gluten-free alternative will turn out crumblier than the standard version, so we don’t recommend using it in applications where it must hold a distinct shape.

Edible Chocolate Chip Cookie Dough
Servings:12-16 (makes about 2 cups)
Active time: 30 mins; Total time: 1 hour 10 mins
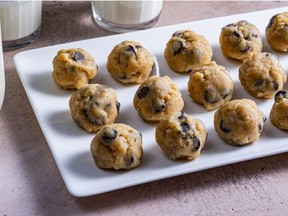
Eating cookie dough is a time-honored tradition, but this treat of a recipe addresses the food safety concerns by skipping the raw egg and heating the flour with hot butter to form a roux. This centuries-old cooking technique keeps the mixture between 200 and 300 degrees for less than 10 minutes and evenly cooks the flour while it is suspended in the hot liquid.
Advertisement 7
Article content
One note: Because you need to work quickly while making the dough, it’s important to have all your ingredients measured and close at hand before you start.
Storage: Refrigerate for up to 3 days, or freeze for up to 3 months. For both fridge and freezer storage, scoop the dough into balls or crumbles while it is still malleable (right after adding the chocolate chips), freeze or refrigerate on a sheet pan, then transfer to a zip-top bag or jar. It stays soft enough that you can enjoy it straight from the fridge or freezer. Like any cookie dough, it will not freeze completely solid.
INGREDIENTS
10 tablespoons (140 grams) unsalted butter (see Notes)
1 cup (125 grams) all-purpose flour
1/4 cup (60 millilitres) whole milk, plus more as needed
1/3 cup (65 grams) granulated sugar
1/3 cup (75 grams) packed light or dark brown sugar
1 teaspoon vanilla extract
1/2 teaspoon fine salt, plus more as needed
1/2 cup (85 grams) chocolate chips (any type)
DIRECTIONS
Step 1
Advertisement 8
Article content
In a medium (3-quart/3-liter) saucepan over medium heat, melt the butter, stirring occasionally. Keep a close eye on it and reduce the heat as needed to prevent burning. It will start out very loud, and after a few minutes will suddenly get a bit quieter as the water in the butter cooks out and evaporates. As soon as that happens, add the flour and cook, still over medium heat, stirring constantly and reducing the heat as needed to keep it from scorching, until the mixture reaches 300 degrees on an instant-read thermometer and you start to see a few golden-brown flecks, 5 to 7 minutes. The mixture will smell nutty and almost toffee-like.
Step 2
Immediately remove from the heat, add the milk (the mixture will bubble up and thicken), and stir until thoroughly combined, about 30 seconds. Stir in the sugars, vanilla and salt.
Step 3
Transfer the mixture to a medium bowl and refrigerate for 30 to 60 minutes. (Set a timer, because if you leave it too long, it will solidify and it will be difficult to stir in the chocolate chips. It will take closer to 30 minutes in a steel bowl and 60 minutes in a glass container.) Check on it after 30 minutes, then check again every 10 minutes or so. If during chilling you notice the dough is too crumbly and dry, stir in 1 teaspoon of milk at a time until it reaches your desired consistency.
Advertisement 9
Article content
Step 4
Once the dough is still soft enough to stir (and no longer warm to the touch, so it will not melt the chocolate), stir in the chocolate chips. Taste, and season with more salt, if desired. Serve right away, or scoop or crumble into your desired portions before refrigerating or freezing.
Substitutions: To make this vegan or dairy-free >> use nondairy butter in place of the regular butter; soy milk or almond milk in place of the dairy milk; and vegan chocolate chips. If you strictly avoid all alcohol >> use 1 teaspoon vanilla powder or nonalcoholic vanilla flavoring instead of vanilla extract.
Variations: To make snickerdoodle dough: Skip the chocolate chips. Omit the brown sugar and use all granulated sugar for a total of 140 grams. After molding into your desired shape (balls, crumbles or a sheet), dust with cinnamon sugar (two parts sugar to one part cinnamon, or your preferred ratio) before chilling. To make rainbow sprinkle dough: Omit the brown sugar and use all granulated sugar for a total of 140 grams. Increase the vanilla to 2 teaspoons. At the point where you would stir in the chocolate chips, instead stir in 1/2 cup (80 grams) rainbow sprinkles. Monster cookie dough: Add 1/3 cup (35 grams) old-fashioned rolled oats, 1/4 cup (65 grams) natural creamy peanut butter and 2 tablespoons more milk when you add the sugars, and replace half or all of the chocolate chips with mini M&Ms. If you’re gluten-free, you can make this recipe with a cup-for-cup replacement blend. We used Bob’s Red Mill Gluten Free 1-to-1 Baking Flour in our testing. It will look much thinner during the roux stage, but it will thicken once you add the milk. With a gluten-free flour blend, the mixture will start browning earlier, so you will need to pour in the milk around 260 to 270 degrees to make sure it doesn’t scorch. This gluten-free alternative will turn out crumblier than the standard version, so we don’t recommend using it in applications where it must hold a distinct shape.
Notes: If using a higher-fat European butter, reduce the amount to 8 tablespoons (1 stick/113 grams).
Nutritional facts per serving (2 tablespoons), based on 16: Calories: 154, Fat: 9 g, Saturated Fat: 6 g, Carbohydrates: 18 g, Sodium: 75 mg, Cholesterol: 19 mg, Protein: 1 g, Fibre: 1 g, Sugar: 12 g.
This analysis is an estimate based on available ingredients and this preparation. It should not substitute for a dietitian’s or nutritionist’s advice.
From cookbook author and food blogger Kathryn Pauline.
Article content